
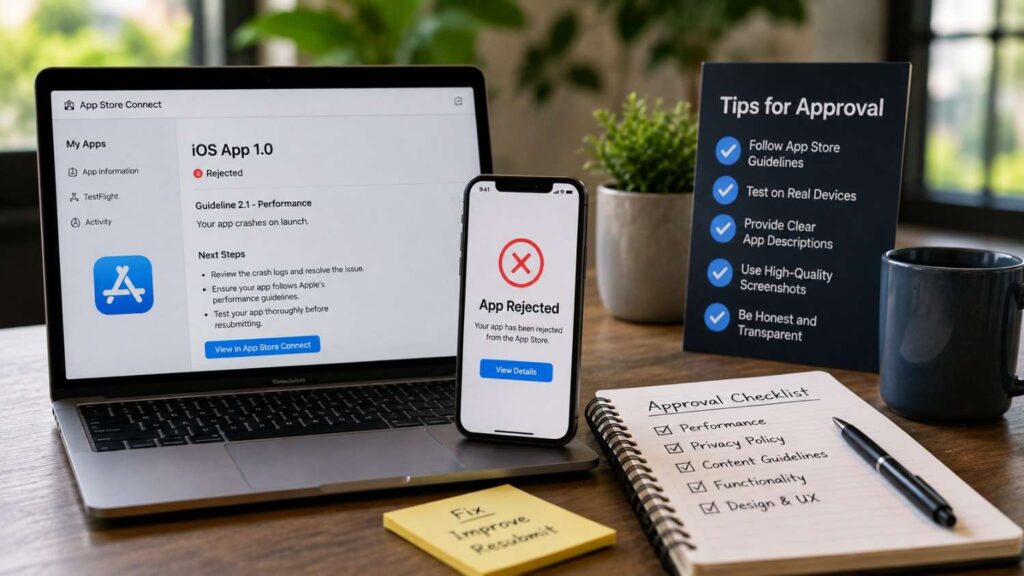
How to Handle App Store Rejections: Tips for Approval
App Store rejection can delay a launch, disrupt a marketing campaign, and create pressure across development, product, legal, and leadership teams. However, rejection does not automatically mean the app is poor or permanently blocked from publication. In most cases, it means the submitted version contains a technical defect, incomplete information, inaccessible functionality, inaccurate metadata, or a policy conflict that must be corrected or explained.
Learning how to handle App Store rejections requires a structured process. The worst response is to make random changes and repeatedly resubmit the application without understanding the reviewer’s concern. The better approach is to identify the exact issue, reproduce it, assign responsibility, document the correction, and make the next review as straightforward as possible.
Apple and Google evaluate more than whether an app opens successfully. Their review systems consider functionality, user safety, privacy, payments, content, permissions, store-listing accuracy, account access, and compliance with platform-specific rules. A technically stable app may still be rejected because its screenshots are misleading, its privacy declarations are incomplete, or reviewers cannot reach a key feature.
In my experience, the strongest submissions are not simply bug-free. They are review-ready. That means the build works as expected, every important claim can be verified, restricted content is accessible through a stable demo account, and review notes clearly explain anything the reviewer may not understand immediately.
This guide explains how to diagnose Apple App Store and Google Play rejections, correct the most common problems, prepare an effective appeal, and establish a submission process that reduces future failures.
Why Do Apps Get Rejected?
Apps are rejected when the submitted product, supporting information, or developer declarations fail to meet a platform’s technical, commercial, privacy, content, or user-experience requirements. The reason may be obvious, such as a crash during launch, but it may also be less visible. An analytics SDK could collect data that was not declared, a subscription screen could omit essential pricing information, or reviewers could be unable to enter an account-protected area.
Developers sometimes believe an app should pass because it works on their own devices. That assumption is unreliable. Internal testers often use established accounts, trusted networks, saved permissions, existing data, and known navigation paths. Reviewers usually approach the app as new users. They may use different devices, operating systems, locations, accessibility settings, and network conditions.
The review team also compares the app with its listing, privacy documentation, content ratings, payment model, and submitted declarations. Any inconsistency can create a rejection even when the app’s core functionality appears stable.
Understanding the most common app review rejection reasons helps teams investigate more efficiently. Although every submission is different, failures usually fall into three broad categories: incomplete or unreliable functionality, inaccurate or misleading presentation, and non-compliant handling of privacy, permissions, payments, or restricted access. Each category requires a different corrective response.
Technical Problems and Incomplete Functionality
Technical defects are among the clearest and most preventable reasons for rejection. These issues include crashes, frozen screens, unresponsive controls, broken links, failed API requests, missing content, placeholder text, inaccessible servers, and features that stop working after a particular action. Reviewers may also reject an app that appears unfinished, even if its primary screen loads correctly.
Testing should cover the complete user journey rather than only the most common path. Create a new account, verify email or phone registration, log in and out, recover a forgotten password, deny permissions, change network conditions, make a purchase, cancel a process, and reopen the app after termination. Test empty states, error messages, expired sessions, and unavailable backend services.
The exact release build must be tested on supported devices. A debug build may include tools, permissions, endpoints, or settings that are absent from the submitted version. Feature flags can also cause reviewers to see a different product from internal testers.
Before resubmitting, developers should inspect crash reports, server logs, analytics events, and device-specific behaviour. Correcting only the screen mentioned in the rejection may be insufficient if the same underlying problem affects several workflows.
Inaccurate Metadata or Misleading Claims
Store metadata creates expectations about what the app does, who it serves, and what users receive after installing it. Reviewers compare those claims with the submitted build. If the description, screenshots, promotional text, category, keywords, subscription information, or preview videos suggest unavailable functionality, the listing may be considered misleading.
A common problem occurs when marketing assets are prepared before the final product is locked. Screenshots may show an earlier interface, a future feature, a premium workflow, or sample results that ordinary users cannot reproduce. Even small differences can matter when they change the meaning of a feature or transaction.
Every claim should be tested against the reviewed version. If the listing says users can export reports, the reviewer must be able to find and test that function. If a screenshot shows live tracking, the app should not display only static estimates. Pricing, trial periods, recurring charges, and limitations should also be clear.
Metadata should explain the app accurately without relying on exaggerated language. Avoid unsupported claims such as “guaranteed,” “official,” “number one,” or “100% secure” unless they can be demonstrated and are permitted. A careful metadata audit often resolves rejection without major development work.
Privacy, Permissions, Payments, and Restricted Access
Privacy and access-related issues are more complex because they often involve several systems at once. An app may collect account details, device identifiers, location information, payment data, usage analytics, advertising information, or diagnostic records. Developers must understand not only what their own code collects but also what third-party SDKs transmit or store.
Privacy declarations should match the application’s real behaviour. The privacy policy, Apple privacy details, Google Play Data Safety form, permission prompts, SDK documentation, and network activity should tell a consistent story. Updating a form without changing the underlying app does not correct an actual policy problem.
Permissions also need a clear purpose. Asking for location, camera, microphone, contacts, photos, or background access without an obvious core function may lead to rejection. The permission explanation should tell users what is accessed and why it is needed at the moment the request appears.
Payment flows create additional risk. Subscription terms, pricing, renewal conditions, restoration options, and purchase methods must follow platform rules.
Restricted content presents another challenge. Reviewers need reliable access to login-protected, role-based, paid, regional, or organisation-only features. Without valid credentials and clear instructions, they cannot verify compliance.
What Should You Do Immediately After a Rejection?
The first hours after a rejection should be used for diagnosis, not speculation. Teams often lose time because several people interpret the message differently, make unrelated changes, or respond before confirming the reported behaviour. A disciplined response begins with one shared record of the rejection and a clearly assigned owner.
Create a rejection log that includes the platform, application version, build number, submission date, review date, cited guideline, reviewer comments, screenshots, attachments, and current status. Record every response and corrective action. This becomes especially valuable when a release receives more than one rejection or when different teams manage iOS and Android submissions.
Next, classify the issue. Determine whether it concerns code, backend availability, metadata, privacy, account access, content, payment, permissions, or declarations. This prevents engineers from rebuilding the app when a store-listing correction would be enough, or marketers from changing screenshots when the actual defect is technical.
Your team should then reproduce the reviewer’s experience and decide whether the rejection is valid. When it is valid, correct it completely. When the app already complies and the reviewer may have lacked information, prepare a concise clarification or appeal supported by evidence.
The immediate objective is not merely to resubmit quickly. It is to remove uncertainty so the next submission is accurate, consistent, and easy to assess.
Read the Entire Rejection Message
Read every part of the rejection message before assigning work. Review communications may contain a policy number, affected feature, device information, screenshot, technical note, or link to documentation. Focusing only on the first sentence can cause a team to miss the most useful diagnostic information.
Record the cited rule exactly as written. Then open the official policy and read the surrounding sections, definitions, exceptions, and examples. A short rejection notice may describe only the observed problem, while the full guideline explains what the platform expects.
Confirm which build and app version were reviewed. If several submissions occurred close together, your team may mistakenly investigate a later build that the reviewer never received. Also check whether the rejection applies to the binary, a subscription product, in-app event, store listing, privacy response, content rating, or another submitted item.
Study any screenshot or screen recording carefully. Look for the time, device state, visible account, network condition, selected region, and navigation path. Small details may reveal the cause.
Finally, rewrite the rejection internally in plain language. For example: “The reviewer could not access the premium dashboard because the supplied account did not have an active subscription.” A clear problem statement makes correction much easier.
Reproduce the Reviewer’s Experience
Reproducing the issue is the most important technical step because it turns a general rejection into an observable problem. Start with a clean installation on a device that resembles the reviewer’s environment. Remove saved accounts, cached data, existing permissions, stored purchases, and developer configuration. Approach the app as someone using it for the first time.
Follow the reviewer’s stated path exactly before testing alternative explanations. If the rejection occurred during registration, do not begin from an already authenticated account. If it involved a subscription, test the complete purchase and restoration sequence. If the issue appeared on a specific device or operating system, use that combination when possible.
Test conditions that internal teams often overlook. These include slow or unstable networks, denied permissions, expired tokens, unavailable APIs, empty accounts, unsupported regions, disabled notifications, low storage, and interrupted payments.
Compare client-side behaviour with backend logs. The interface may display a generic error while the server records an expired credential, access-control failure, or malformed request.
Document the reproduction with screenshots, recordings, timestamps, and exact steps. If the problem cannot be reproduced, that evidence still matters. It may indicate an intermittent service failure, reviewer-access limitation, or misunderstanding that should be addressed through clearer notes.
Decide Whether to Fix or Appeal
The decision to fix or appeal should be based on evidence, not frustration or release pressure. Fix the submission when the app clearly fails to meet the cited rule, when the reported behaviour can be reproduced, or when the review message reveals incomplete information that your team should have supplied.
An appeal is appropriate when the app already complies, the reviewer appears to have tested an unintended path, the cited rule does not apply, or the rejection refers to an older or incorrect build. However, your position must be defensible. A good appeal identifies the relevant policy, explains the app’s behaviour, and provides direct evidence that the reviewer can verify.
Sometimes the correct response is a combination of both. You may clarify a misunderstanding while also improving review notes, access instructions, or interface wording to prevent the same confusion. This does not mean admitting a violation. It means reducing ambiguity.
Consider the release timeline realistically. An appeal may take time and may not succeed. If a compliant correction is straightforward, fixing the issue may be more efficient than debating it. On the other hand, making unnecessary product changes to satisfy an incorrect interpretation can create long-term business or user-experience problems.
Choose the path that produces the strongest compliance position, not simply the fastest response.
| Review Preparation Item | Apple App Store | Google Play | Why It Matters |
|---|---|---|---|
| Verify app functionality | ✔ Required | ✔ Required | Prevents crashes and broken user flows during review. |
| Test reviewer login credentials | ✔ Required | ✔ Required | Ensures reviewers can access restricted features. |
| Review privacy disclosures | App Privacy Details | Data Safety Form | Keeps declared data practices aligned with actual app behavior. |
| Validate store metadata | Screenshots, description, keywords | Store listing assets | Prevents misleading information and metadata-related rejections. |
| Check payment implementation | Apple In-App Purchase | Google Play Billing | Avoids payment policy violations. |
| Confirm reviewer notes | Recommended | Recommended | Helps reviewers quickly verify important features. |
| Test release build | Final production build | Final App Bundle (AAB) | Reduces technical review failures before submission. |
How to Fix an Apple App Store Rejection
When an app is rejected by Apple, App Store Connect becomes the central place for reviewing the decision, communicating with App Review, updating submission details, and resubmitting the corrected product. The first step is to determine whether the issue concerns the app binary, metadata, privacy details, in-app purchases, account access, or another submitted component.
Apple’s review process is highly dependent on clarity. Reviewers must be able to install the submitted build, understand the app’s purpose, reach its main functionality, and verify any restricted or paid features. A functional app can still fail when important information is missing from the App Review Information section.
Developers should read the cited App Store Review Guideline in full rather than responding only to the rejection summary. Apple’s guidelines include technical, design, business, legal, privacy, and content requirements. Some sections contain exceptions or conditions that can determine whether a fix or clarification is appropriate.
Many development teams also review common rejection patterns before resubmitting, as real-world examples often help identify issues that official documentation may not illustrate in detail.
Once the issue is understood, correct only what is necessary but investigate the full workflow surrounding it. A login failure may indicate a temporary credential problem, but it may also reveal that the reviewer cannot bypass two-factor authentication or regional restrictions.
A strong Apple resubmission combines a corrected build or metadata update with concise review notes that explain what changed and how the reviewer can confirm it.
Reply Through App Store Connect
App Store Connect allows developers to respond directly to review messages and provide supporting information. Use this communication channel to clarify the issue, ask a focused question, explain a correction, or supply evidence. The response should be written for a reviewer who may have limited time and no prior knowledge of your internal product terminology.
Begin by acknowledging the cited guideline and stating whether you reproduced the problem. Then explain the cause and correction in plain language. For example: “The reviewer account was missing the administrator role required to open the reporting screen. We have updated the account permissions and confirmed that the feature is now accessible.”
Provide numbered verification steps rather than a general request to “check again.” Mention the exact screen, button, menu, test account, and expected result. Attach a short screenshot or recording when it can demonstrate the corrected behaviour more efficiently than text.
Avoid sending several messages that introduce different explanations. Coordinate internally and appoint one person to communicate with App Review.
When clarification is needed, ask a narrow question tied to the guideline. Do not submit a long argument or unrelated product history. The goal is to help the reviewer reach a confident decision with minimal ambiguity.
Supply a Stable Demo Account and Review Notes
A stable demo account is essential when the app requires login, membership, subscription access, organisation approval, or a particular user role. The account should remain active throughout the review period and should not depend on a temporary password, one-time code, manual approval, or location-specific condition.
Configure the account with enough data to demonstrate important features. An empty account may technically work but still prevent the reviewer from testing dashboards, exports, transactions, messaging, or reporting tools. Add realistic sample information without using real customer data.
Review notes should guide the reviewer through the shortest reliable path. Explain the purpose of the account, where to log in, which workspace or project to select, and how to access restricted functionality. When multiple roles are required, provide separate credentials and clearly label each one.
Check the account immediately before submission and again after any backend deployment. Password resets, database refreshes, expired subscriptions, and permission changes can silently invalidate access.
Security remains important, but reviewer access should not be obstructed by avoidable barriers. Use a dedicated, controlled environment and remove unnecessary two-factor authentication or IP restrictions where possible. Once the app is approved, the test account can be rotated or disabled according to your security process.
Update the Correct Submission Element
Not every Apple rejection requires a new binary. Determining which submission element must change can save time and prevent unnecessary development work. A code-level issue such as a crash, broken control, permission problem, missing account-deletion feature, or incorrect purchase flow generally requires a corrected build.
Metadata problems may be resolved without changing the binary. Examples include inaccurate screenshots, unclear descriptions, unsupported claims, invalid support links, incorrect category selection, missing review notes, or incomplete promotional information. Privacy declarations and age-rating responses may also need updates through App Store Connect.
However, teams should not assume a metadata correction is sufficient when the underlying app behaviour remains inconsistent. If a screenshot is misleading because the feature no longer exists, removing the screenshot may resolve the listing issue. If the app still presents inaccurate information internally, code changes may also be required.
Document exactly what was changed. State whether you uploaded a new build, updated metadata, changed server configuration, replaced reviewer credentials, corrected privacy details, or modified an in-app purchase.
Before resubmission, confirm that the intended build is selected and that all related items are included. Release teams sometimes correct the application but accidentally submit an earlier build or leave an unresolved product attached to the submission.
Related Articles
How to Resolve a Google Play App Rejection
A Google Play app rejection may involve the app bundle, store listing, developer declarations, permissions, advertising behaviour, target audience, data collection, account access, or another active release. Google Play Console provides several areas that must be reviewed together, including Policy Status, App content, Data Safety, testing tracks, production releases, and store-listing information.
Developers should first distinguish between a rejection, removal, suspension, warning, and account-level enforcement action. These outcomes have different consequences and should not be treated as equivalent. A rejected release may usually be corrected and resubmitted, while a suspension or account action requires more careful handling.
Google’s review and enforcement systems may evaluate versions across multiple tracks. Correcting only the production release is not always enough when a non-compliant bundle remains active in internal, closed, or open testing. This is one of the most common reasons teams believe they fixed an issue but continue receiving enforcement notices.
The app’s declarations must also match its behaviour. The Data Safety form, privacy policy, advertising statements, target-audience selections, permission declarations, and reviewer-access instructions should be reviewed as a complete compliance set.
A successful resubmission requires more than uploading a new bundle. Developers must remove or deactivate violating versions, correct inaccurate declarations, verify reviewer access, and explain what changed.
Review Policy Status and the Enforcement Notice
Begin in the Policy Status section of Google Play Console. This area identifies active policy issues and may show the affected app version, policy category, enforcement type, and available action. Read the complete notice and the linked policy documentation before making changes.
Check the email sent to the developer account owner as well. Important enforcement details may be delivered outside the console, particularly when the issue affects account standing or requires an appeal. Make sure the email address associated with the account is monitored by someone who can coordinate a timely response.
Translate the enforcement notice into a specific internal problem statement. For example: “The app requests background location, but the declared core functionality does not justify continuous access.” This is more useful than assigning a vague task such as “fix Google rejection.”
Identify whether the violation appears in the binary, store listing, privacy policy, Data Safety form, target-audience settings, advertising implementation, payment model, or login instructions. Different teams may need to work together.
Do not rely on screenshots from an earlier console state. Policy requirements and release configurations can change during remediation. Review the current status immediately before resubmission and keep a record of the enforcement details, corrective actions, and final declaration values.
Replace Non-Compliant Bundles Across All Tracks
Google Play supports several release tracks, including internal testing, closed testing, open testing, and production. A policy violation may remain active when the offending app bundle or APK is still available on any of these tracks. Developers sometimes upload a corrected production bundle but overlook an older testing release that contains the same non-compliant behaviour.
Audit every active track and identify all versions associated with the violation. Compare version codes, release names, rollout status, and availability. Deactivate or replace affected versions according to the enforcement instructions.
Be careful with staged rollouts. A previous production version may still be delivered to part of the audience while a new version reaches only a percentage of users. If the older version violates policy, a partial rollout may not resolve the issue.
Also inspect draft and pending releases. A release that has not reached production may still create confusion during review if it contains inaccurate declarations or outdated bundles.
After uploading the compliant app bundle, verify that the version code is higher than earlier releases, the correct artifact is attached, and release notes accurately describe the change where appropriate.
The objective is to ensure that no active delivery path continues to expose the violating implementation. A complete track audit should be part of every Google Play rejection response.
Correct App Content and Data Safety Information
The App content area contains declarations that help Google understand how the application operates. These may include privacy-policy information, Data Safety responses, advertising declarations, target-audience details, content ratings, sensitive-permission forms, news-app status, health-related disclosures, financial features, and instructions for accessing restricted content.
Each answer should match the current application and its third-party integrations. Do not complete declarations from memory or reuse responses from an earlier version without verification. Adding an analytics, advertising, authentication, customer-support, or crash-reporting SDK may change the app’s data practices.
Review the Data Safety form against actual network traffic, SDK documentation, privacy-policy language, account-creation process, and data-deletion options. Confirm what data is collected, whether it is shared, why it is processed, how it is protected, and whether collection is optional.
Reviewer-access information should also be complete. Supply reusable credentials, clear navigation instructions, and any secondary account needed to test messaging, approval, marketplace, or role-based workflows. Remove one-time password requirements or provide an approved method for bypassing them.
If the app behaves differently by country, account type, device, or subscription level, explain those conditions. Accurate declarations and practical access instructions reduce uncertainty and help prevent repeated Google Play app rejection.
App Rejection Problems and Recommended Fixes
App rejection notices often describe the observed outcome rather than the complete underlying cause. For example, a reviewer may report that a dashboard does not load. The immediate symptom is a blank screen, but the actual cause could be an expired test account, a region-restricted API, a backend permission error, or an unhandled network failure. Effective remediation requires identifying both the visible problem and the system responsible for it.
The following table connects common rejection scenarios with likely causes, corrective actions, and appropriate ownership. It should be used as a diagnostic starting point rather than a replacement for the official policy cited in the rejection.
| Rejection Problem | Likely Cause | Recommended Action | Responsible Owner |
|---|---|---|---|
| App crashes during review | Untested production build, API failure, memory problem, or device-specific defect | Reproduce the crash, inspect logs, test the submitted build, and upload a corrected binary | Engineering and quality assurance |
| Reviewer cannot log in | Expired credentials, OTP requirement, geo-restriction, missing role, or inactive subscription | Create a reusable review account and provide numbered access instructions | Product and operations |
| Privacy declaration mismatch | Undeclared SDK activity, outdated form, or inconsistent privacy policy | Audit SDKs, network calls, privacy documentation, and platform declarations | Legal, engineering, and compliance |
| Misleading screenshots | Outdated interface, unavailable feature, or inaccurate results | Replace screenshots and align every claim with the reviewed build | Marketing and product |
| Permission rejected | Permission is unnecessary, excessive, or poorly explained | Remove the permission or document its essential use clearly | Engineering and compliance |
| Purchase flow rejected | Unsupported payment method, unclear pricing, or broken restoration | Review platform billing rules and test every transaction state | Engineering and product |
| Minimum functionality concern | Limited native value, unfinished workflows, or excessive dependence on web content | Strengthen useful functionality and explain the app’s distinct purpose | Product and engineering |
| Repeated policy rejection | Partial correction, outdated declarations, or violating bundle on another track | Audit every build, release track, store field, and declaration | Release manager |
After identifying the likely cause, assign one owner who coordinates the complete response. Multi-team issues still need a single accountable person. This prevents separate departments from correcting different versions of the problem and ensures the final submission remains consistent.
How to Write an Effective App Rejection Appeal
An app rejection appeal should demonstrate that the submitted application complies with the cited policy or that the reviewer’s conclusion was based on incomplete information. It is not a general complaint about the review process, launch deadline, development cost, or business impact. Those factors may be important internally, but they do not establish compliance.
The strongest appeals are easy to evaluate. They identify the exact guideline, explain the relevant app behaviour, provide numbered verification steps, and attach focused supporting evidence. The reviewer should not have to interpret long technical discussions or search through the application to understand your position.
Before appealing, confirm that the reported issue cannot be corrected more appropriately through a normal resubmission. If the app genuinely violates the policy, an appeal may delay the release without improving the outcome. Correcting the product is usually the stronger path.
An appeal becomes appropriate when the policy has been applied to the wrong feature, the reviewer did not use the provided account correctly, the app falls within a stated exception, the issue relates to an outdated build, or the reported behaviour cannot be reproduced.
Keep the message professional. Review teams handle large numbers of submissions, and a concise evidence-based explanation is more persuasive than frustration. The appeal should focus on what the platform can verify now.
Lead With the Guideline and Evidence
Begin the appeal by naming the cited guideline or policy section. This establishes that you understand the reason for rejection and have reviewed the relevant requirement. Next, state your position clearly: either the app already complies, the cited rule does not apply, or the reviewer may not have reached the correct functionality.
Support the position with direct evidence. Useful materials include a short screen recording, annotated screenshots, numbered test instructions, technical documentation, permission-use explanations, proof of licensing or content rights, account credentials, backend logs, and a comparison between the rejected build and current configuration.
Evidence should be relevant and easy to inspect. A five-minute promotional video is less useful than a thirty-second recording that shows the exact disputed workflow. Large documents should identify the specific page or paragraph that supports the appeal.
Avoid making unsupported statements such as “the app is fully compliant” or “the reviewer is incorrect.” Explain why. Quote or paraphrase only the necessary part of the policy and connect it directly with observable app behaviour.
The goal is to reduce the reviewer’s decision to a straightforward verification task. When the evidence is organised and the path is clear, the appeal is more likely to receive meaningful consideration.
Keep the Message Focused
An effective appeal usually follows a simple structure. First, acknowledge the rejection and cited guideline. Second, describe the relevant feature or behaviour. Third, explain why it complies or how the misunderstanding occurred. Fourth, provide verification steps and evidence. Finally, request reconsideration or clarification.
Keep the appeal limited to the disputed issue. Do not include unrelated product features, business achievements, customer testimonials, investor expectations, or marketing plans. These details do not help the reviewer determine whether the application meets platform requirements.
Use plain language wherever possible. Technical details may be necessary, but they should explain the app rather than overwhelm the reader. Define internal terms and avoid abbreviations that are not common outside your team.
A focused appeal might say that the reviewer account lacked the correct role, the account has now been updated, and the feature can be tested through a specific path. It should not include several pages describing the entire account-permission architecture.
Coordinate all communication through one representative. Contradictory explanations from product, engineering, and legal teams weaken credibility.
Before sending, ask someone unfamiliar with the issue to read the appeal. If that person cannot understand what happened, what evidence matters, and what the reviewer should do next, the message needs further editing.
Appeal Only With a Defensible Position
An appeal should be filed only when your team can explain and support its position. Disagreement alone is not enough. The platform’s decision may feel inconsistent with another app, an earlier approval, or a competitor’s implementation, but those comparisons rarely prove compliance.
Other apps may operate under different categories, regions, licences, account arrangements, business models, or historical approvals. Some may also be non-compliant but not yet reviewed. Base the appeal on the current written policy and your own application’s behaviour.
A defensible position includes evidence that can be independently verified. If the appeal depends on an exception, show how the app meets every condition of that exception. If the reviewer tested an outdated build, identify the build numbers and submission history. If access failed temporarily, provide logs or account records and explain the correction.
Consider the risk of preserving a questionable implementation. Winning a narrow appeal does not eliminate future compliance obligations. A later update may trigger another review, and policy language may evolve.
When the position is weak, fix the app. When the position is strong, appeal concisely. This disciplined distinction protects development resources and prevents emotional decision-making from controlling the release process.
How to Prevent Future App Store Rejections
Preventing rejection is more efficient than responding to it. A mature release process treats platform compliance as an ongoing product responsibility rather than a checklist completed shortly before submission. Policies affect product design, engineering, privacy, payments, marketing, customer support, and legal documentation. Waiting until release day to review them creates avoidable risk.
Teams should build compliance checks into feature planning. When a feature requires sensitive permissions, subscription billing, user-generated content, health information, financial activity, location tracking, children’s access, or third-party data collection, platform requirements should be reviewed before development begins.
The submission process should also have clear ownership. One person or release team should confirm the final build, store listing, review notes, credentials, privacy declarations, and release-track status. Without central coordination, departments may work from different versions of the product.
Automation can improve technical testing, but human review remains necessary. Automated checks may detect crashes and broken links, yet they cannot always identify misleading screenshots, unclear subscription language, incomplete access instructions, or an inconsistent privacy explanation.
The most reliable App Store approval tips are procedural: maintain a compliance matrix, run a formal readiness review, audit third-party SDKs, and document every release decision. These practices make review outcomes more predictable and reduce the chance that the same problem returns in later versions.
Build a Policy Compliance Matrix
A policy compliance matrix connects platform requirements with actual product features and responsible owners. It can be maintained in a spreadsheet, project-management system, or internal compliance tool. The format matters less than keeping it accurate, searchable, and connected with the release process.
Useful columns include platform, policy section, feature name, data collected, permissions used, third-party SDKs, payment method, target audience, store declaration, reviewer instructions, risk level, responsible owner, and last verification date. Add links to technical specifications, privacy documents, and evidence where appropriate.
Each major feature should have a policy review before development is considered complete. For example, a background location feature should identify the user benefit, required permission, disclosure language, privacy impact, platform declaration, testing method, and fallback behaviour when access is denied.
The matrix should also record differences between iOS and Android. A feature that is acceptable on one platform may require a different implementation or declaration on the other.
Update the document whenever the app adds an SDK, changes its payment model, modifies account creation, enters a new country, targets a different age group, or introduces new data use.
A maintained matrix reduces dependence on individual memory and helps new team members understand why certain product decisions were made.
Run a Submission Readiness Review
A formal readiness review should take place after the release candidate is stable but before it is submitted. The review must use the exact production build and final store assets. Testing an earlier build while assuming the last changes are harmless creates unnecessary risk.
Begin with a clean installation. Test registration, login, logout, password recovery, account deletion, permissions, navigation, notifications, purchases, subscriptions, restoration, cancellations, support links, privacy links, and error states. Use more than one supported device and operating system where possible.
Review the product as a new user. Confirm that the app’s purpose is clear, important functions are discoverable, and required information appears before users make commitments or payments.
Next, compare the current interface with every screenshot, preview, description, promotional claim, and subscription statement. Remove outdated assets and unsupported language.
Validate the reviewer account independently. Someone outside the development team should follow the submitted notes without verbal assistance. If they cannot reach a feature, the reviewer may face the same problem.
Reviewing additional pre-submission best practices alongside your internal release checklist can help catch overlooked compliance issues before the app enters the review process.
Finally, confirm all declarations and release settings. Check privacy details, Data Safety responses, content ratings, permissions, target audience, in-app products, selected build, release track, geographic availability, and support information.
Document approval from each responsible team before submission.
| Submission Component | What to Review | Audit Frequency | Business Impact |
|---|---|---|---|
| App Build | Stability, crashes, performance | Every release | Reduces technical rejections |
| Store Listing | Title, screenshots, description | Before each submission | Prevents metadata violations |
| Privacy & Data Collection | SDK data usage and disclosures | Whenever SDKs change | Maintains policy compliance |
| Permissions | Camera, location, contacts, notifications | Every feature update | Avoids unnecessary permission requests |
| Third-Party SDKs | Analytics, ads, authentication libraries | Monthly | Prevents unexpected compliance issues |
| Reviewer Access | Demo account and review instructions | Every submission | Improves review efficiency |
| Release Tracks | Production, internal, open, closed testing | Before publishing | Prevents old non-compliant builds from remaining active |
Audit Third-Party SDKs Continuously
Third-party SDKs can introduce compliance risk because they may collect, transmit, process, or share data outside the application’s visible workflows. Common examples include analytics, advertising, crash reporting, attribution, authentication, mapping, chat, payment, social login, and customer-support tools.
Maintain a complete SDK inventory with version numbers, purposes, data categories, network destinations, privacy documentation, and responsible owners. Review the inventory whenever a library is added or updated.
Do not assume that an SDK’s default behaviour matches your declarations. Some tools enable device identifiers, location signals, diagnostic data, or advertising features automatically. Configuration changes may be necessary to disable unnecessary collection.
Engineering teams should inspect network traffic and runtime behaviour rather than relying entirely on marketing summaries from vendors. Legal and privacy teams should compare technical findings with the privacy policy, consent flow, Apple privacy details, and Google Data Safety form.
SDK audits should continue after launch. Vendors change features, data practices, endpoints, and documentation. A compliant integration today may require updated declarations or configuration later.
Remove unused SDKs. Even when a library is not actively called, bundled code can create security, privacy, or review concerns. A smaller dependency set is easier to understand, test, and maintain.
Quick Answer About How to Handle App Store Rejections: Tips for Approval
An App Store rejection should be treated as a specific compliance or quality problem rather than a general failure. Begin by reading the complete rejection notice, identifying the cited guideline, and confirming which build, feature, screen, declaration, or store-listing element caused the issue. Reproduce the reviewer’s experience using a clean device and a new account whenever possible. Correct the actual problem, update your review notes, provide stable login credentials, and explain exactly what changed before resubmitting.
Appeal only when the decision appears to be based on a misunderstanding and you can support your position with policy language, screenshots, test steps, technical documentation, or other clear evidence. A vague or emotional appeal rarely works. Approval becomes more likely when reviewers can quickly access the app, understand its purpose, verify its functionality, and confirm that its privacy, payment, content, and metadata practices match platform policies.
What Should You Check First?
The first thing to check is the precise guideline, policy section, or technical behaviour cited in the rejection message. Do not assume the problem based on a brief email subject line. Open the complete review communication and record the affected app version, build number, operating system, device type, reviewer screenshot, and any reproduction steps provided. These details determine whether the problem is related to code, account access, metadata, subscriptions, privacy, permissions, or another compliance area.
Next, confirm that your internal team is testing the exact binary or app bundle submitted for review. Development, staging, and production builds may behave differently because of environment variables, API endpoints, feature flags, certificates, or account permissions. Test the submission from a clean installation rather than an already authenticated device.
You should also check whether the reviewer needed a demo account, paid subscription, organisation membership, physical device, regional access, or special instructions. Many rejections happen because a functional feature is inaccessible to the reviewer. Identifying that gap early prevents unnecessary code changes and repeated submissions.
What Should You Avoid?
Avoid resubmitting the same app immediately without understanding why it failed. A rushed resubmission may return to review quickly, but it will usually produce the same result when the underlying issue remains unresolved. Repeated failures can also make release management more difficult because your team may lose track of which build, metadata version, or policy declaration contains the intended correction.
Do not respond defensively or accuse the reviewer of misunderstanding the app before reproducing the reported issue. Reviewers assess what they can access and observe. If an important workflow is hidden behind an undocumented requirement, the review team cannot be expected to infer it.
You should also avoid temporary passwords, expiring links, one-time passcodes, regional restrictions, or demo accounts that require manual approval. Do not provide lengthy review notes filled with marketing language. Review instructions should be practical, numbered, and focused on verification.
Finally, do not fix only the visible symptom. A privacy rejection, for example, may involve the app, an SDK, the privacy policy, and store declarations at the same time. Correcting one element while ignoring the others often leads to another rejection.
Frequently Asked Questions About How to Handle App Store Rejections: Tips for Approval
Developers and business owners often have similar questions after receiving a rejection. The most common concerns involve resubmission timing, appeals, account standing, reviewer credentials, repeated enforcement, and whether a new build is always required.
The answers below provide practical general guidance, but the exact response should always follow the cited Apple App Store Review Guideline or Google Play Developer Policy. Platform rules may differ by app category, feature, region, data type, and business model.
Before taking action, distinguish between a normal app rejection and a more serious enforcement outcome such as removal, suspension, or developer-account action. A standard rejected submission can often be corrected through the normal review process. More serious decisions may require specialised legal, technical, or policy support.
Keep a complete record of every rejection, response, build, account credential, declaration, and appeal. This documentation becomes valuable when the same issue appears in a later version or when another team member manages the submission.
The following frequently asked questions focus on the decisions that most directly affect approval. They are written for both first-time publishers and experienced teams managing complex applications.
Why Was My App Rejected by the App Store?
Apps may be rejected for technical defects, incomplete functionality, misleading metadata, privacy inconsistencies, unsupported payment methods, inaccessible content, sensitive-permission misuse, prohibited material, or failure to satisfy another platform requirement. The rejection notice should identify the relevant guideline or policy area.
Do not assume the reason based only on what changed in the latest version. Review teams assess the entire submitted experience, and an older issue may become visible during a new review.
Read the full message, inspect attached screenshots, confirm the reviewed build, and reproduce the reported workflow. Compare the application with its store listing, privacy policy, reviewer notes, and platform declarations.
If the problem is valid, correct the underlying behaviour and every related document. If the application already complies, provide concise evidence and verification instructions.
The most useful question is not simply “Why did the platform reject us?” Ask, “What did the reviewer observe, what requirement does that observation conflict with, and what evidence or change will resolve it?” That framing leads to a practical response rather than speculation.
Can I Resubmit an App After Rejection?
Yes, a rejected app can usually be corrected and resubmitted. Before doing so, identify whether the required change affects the binary, store metadata, privacy declaration, reviewer account, backend configuration, release track, or another submission component.
Do not resubmit simply because the console allows it. Confirm that your team has reproduced the issue, implemented the correction, tested the exact release build, and updated the reviewer notes. A second rejection for the same reason usually means the fix was incomplete or the reviewer could not verify it.
When code changes are required, upload a new build or bundle with the appropriate version information. When the problem is limited to metadata or access instructions, a new binary may not be necessary, depending on the platform and rejection type.
Review all related fields before submitting again. A corrected app can still fail when an outdated screenshot, privacy answer, testing-track bundle, or expired credential remains unchanged.
Resubmission should include a concise explanation of what was corrected and how the reviewer can confirm it. Clear communication reduces the chance of another misunderstanding.
Can I Appeal an Apple App Store Rejection?
Yes, Apple provides mechanisms for communicating with App Review and challenging a rejection when you believe the app complies with the cited guideline. Begin by replying through App Store Connect with a focused explanation and supporting evidence.
An appeal is most appropriate when the reviewer may have misunderstood the feature, lacked required access, tested an outdated build, or applied a guideline that does not fit the app’s actual behaviour. Your response should name the guideline, explain the compliant implementation, and provide numbered verification steps.
Useful evidence includes screenshots, short screen recordings, test credentials, technical documentation, licensing information, and clear explanations of user flows.
Avoid appeals based only on urgency, development cost, competitor behaviour, or previous approval. These factors do not prove compliance.
When the issue is a genuine violation, fixing the app is usually faster and more reliable than appealing. When the app already complies, a structured appeal can prevent unnecessary product changes.
Keep all communication professional and consistent. Assign one team member to manage the case and ensure every statement matches the current build and submitted information.
How Do I Appeal a Google Play Rejection?
Start by opening Google Play Console and reviewing the app’s Policy Status. Read the complete enforcement notice, linked policy, affected version information, and any available appeal instructions. Also review the email sent to the developer account owner.
Before appealing, verify whether the problem exists in any active release track. A corrected production bundle may not resolve the issue when an older non-compliant version remains in internal, closed, or open testing.
A Google Play appeal should explain why the application complies or why the enforcement decision may be based on incorrect information. Include the policy section, relevant app behaviour, version code, test instructions, account credentials, and supporting evidence.
Do not send a general statement claiming that the app is safe or compliant. Show how the implementation meets the requirement.
When the violation is valid, correct every affected area before requesting another review. This may include the app bundle, store listing, privacy policy, Data Safety form, permission declaration, target-audience response, or reviewer-access information.
Keep a record of the appeal and final decision for future releases.
Can I Use the Same Build After an Apple Rejection?
Whether the same build can be used depends on the rejection reason. If the problem is limited to metadata, review notes, screenshots, contact information, or another editable App Store Connect field, Apple may allow the same binary to be resubmitted after the information is corrected.
A new build is generally required when the problem exists inside the application. Examples include crashes, broken features, incorrect permission handling, missing account deletion, unsupported payment behaviour, inaccurate in-app disclosures, or code-level privacy issues.
Backend-only changes require careful judgment. If the app behaviour is corrected through a server configuration, Apple may be able to review the same binary. However, you should explain the server-side correction clearly and verify that it is stable.
Do not select the same build automatically. Confirm that the rejection message and App Store Connect status support that approach.
Before resubmitting, test the build under the same conditions that caused the rejection. Update review notes with the exact correction and verification path.
Using the same build can save time, but only when the rejected issue has genuinely been resolved without modifying the application binary.
Why Does Google Play Keep Rejecting My App?
Repeated Google Play rejection usually means the remediation is incomplete, the violation remains in another release track, the store declarations do not match the app, or reviewers still cannot access the relevant functionality.
Check every active and pending release. An older bundle in internal, closed, open, or production testing may continue to contain the violating code. Confirm that all affected versions have been replaced or deactivated as required.
Next, review the App content section. Compare Data Safety answers, privacy-policy language, advertising declarations, target-audience information, permission forms, and reviewer-access instructions with the current app.
Inspect third-party SDKs and network behaviour. A developer may remove direct data collection while an analytics or advertising library continues transmitting the same information.
Also confirm that the reviewer account is valid, properly authorised, populated with test data, and independent of location or one-time verification.
Do not keep making isolated changes based on guesswork. Create a full compliance checklist for the cited policy and verify each requirement. Repeated rejection is usually a process failure, not evidence that the platform is reviewing the app randomly.
What Login Information Should I Give Reviewers?
Provide a dedicated reviewer account that remains valid throughout the review period. The account should work from the reviewer’s location and should not depend on a temporary password, one-time code, manual approval, device registration, or an employee-only email domain.
Give the account the permissions needed to access all important features. When the app has multiple roles, provide separate credentials and explain what each role can test.
Populate the account with safe sample data. Empty dashboards and inactive subscriptions may prevent reviewers from evaluating the app even when login succeeds.
Write numbered instructions showing where to enter the credentials, which workspace or project to open, and how to reach restricted functionality. Mention any unusual navigation, device requirement, or sequence of actions.
Test the credentials from a clean device immediately before submission. Ask someone outside the product team to follow the instructions without additional help.
Do not use real customer accounts or sensitive production information. A controlled review environment should provide realistic functionality while protecting user data and internal systems.
After approval, rotate or disable the credentials according to your organisation’s security policy.
Conclusion
App Store rejection is manageable when teams respond with evidence, coordination, and a clear understanding of platform requirements. The process should begin with the exact rejection notice, not with assumptions about what the reviewer intended. Once the issue is classified, the team can reproduce the behaviour, identify the responsible system, and decide whether to correct the submission or present a defensible appeal.
Apple and Google evaluate the complete publishing package. That includes the app build, backend behaviour, store listing, privacy practices, payment flow, permissions, SDKs, account access, content declarations, and reviewer instructions. A correction is not complete when only one of these elements changes while related information remains inconsistent.
The most effective response is specific. Explain what caused the issue, what changed, and how the reviewer can verify the correction. Stable demo accounts, numbered instructions, accurate declarations, and focused supporting evidence reduce review friction.
Long-term improvement requires a repeatable submission process. Maintain a policy matrix, audit third-party SDKs, test the production build on clean devices, verify every store asset, and assign one owner to coordinate release readiness.
These practices do more than improve approval chances. They strengthen product quality, user trust, privacy governance, and operational discipline across future releases.
Final Takeaway
The most reliable approach to how to handle App Store rejections is to make compliance visible and easy to verify. Reviewers should not have to guess what the app does, locate hidden functionality, request missing credentials, interpret conflicting privacy statements, or determine whether screenshots represent the current version.
Treat every rejection as a documented quality and compliance issue. Record the cited policy, reproduce the reviewer’s experience, identify the root cause, and inspect every related system. Correct the application, metadata, declarations, access instructions, or release configuration as required.
When an appeal is justified, use evidence rather than emotion. Connect the written policy with observable app behaviour and give the reviewer a direct path to confirm your position.
Prevention remains the strongest strategy. Integrate platform rules into product planning, engineering, testing, privacy reviews, marketing approval, and release management. Do not leave compliance to the final submission stage.
An app that is stable, accurately described, responsibly designed, and straightforward to review has a much stronger chance of approval. More importantly, it is also more likely to deliver a reliable and trustworthy experience after publication.
Next Step
Before submitting again, conduct a complete review of the build, backend services, store listing, screenshots, privacy documentation, platform declarations, permissions, SDKs, payment flow, reviewer credentials, and active release tracks. Assign each area to a named owner and require confirmation that it has been tested against the current release candidate.
Create a short resubmission document that records the original rejection, root cause, corrective action, test evidence, and reviewer-verification path. This prevents conflicting explanations and gives your release manager a reliable reference.
For Apple submissions, confirm that the correct build is selected in App Store Connect and that review notes contain valid credentials and numbered instructions. For Google Play, inspect every testing and production track to ensure no violating bundle remains active.
Have someone who was not involved in development test the submission as a new user. This independent check often reveals missing assumptions that internal teams overlook.
Once every correction is verified, submit a concise response that states exactly what changed. Do not add unrelated information or marketing claims.