
Launching an app should be an exciting milestone.
For many developers and businesses, it turns into a frustrating cycle of rejections, delays, and unclear feedback.
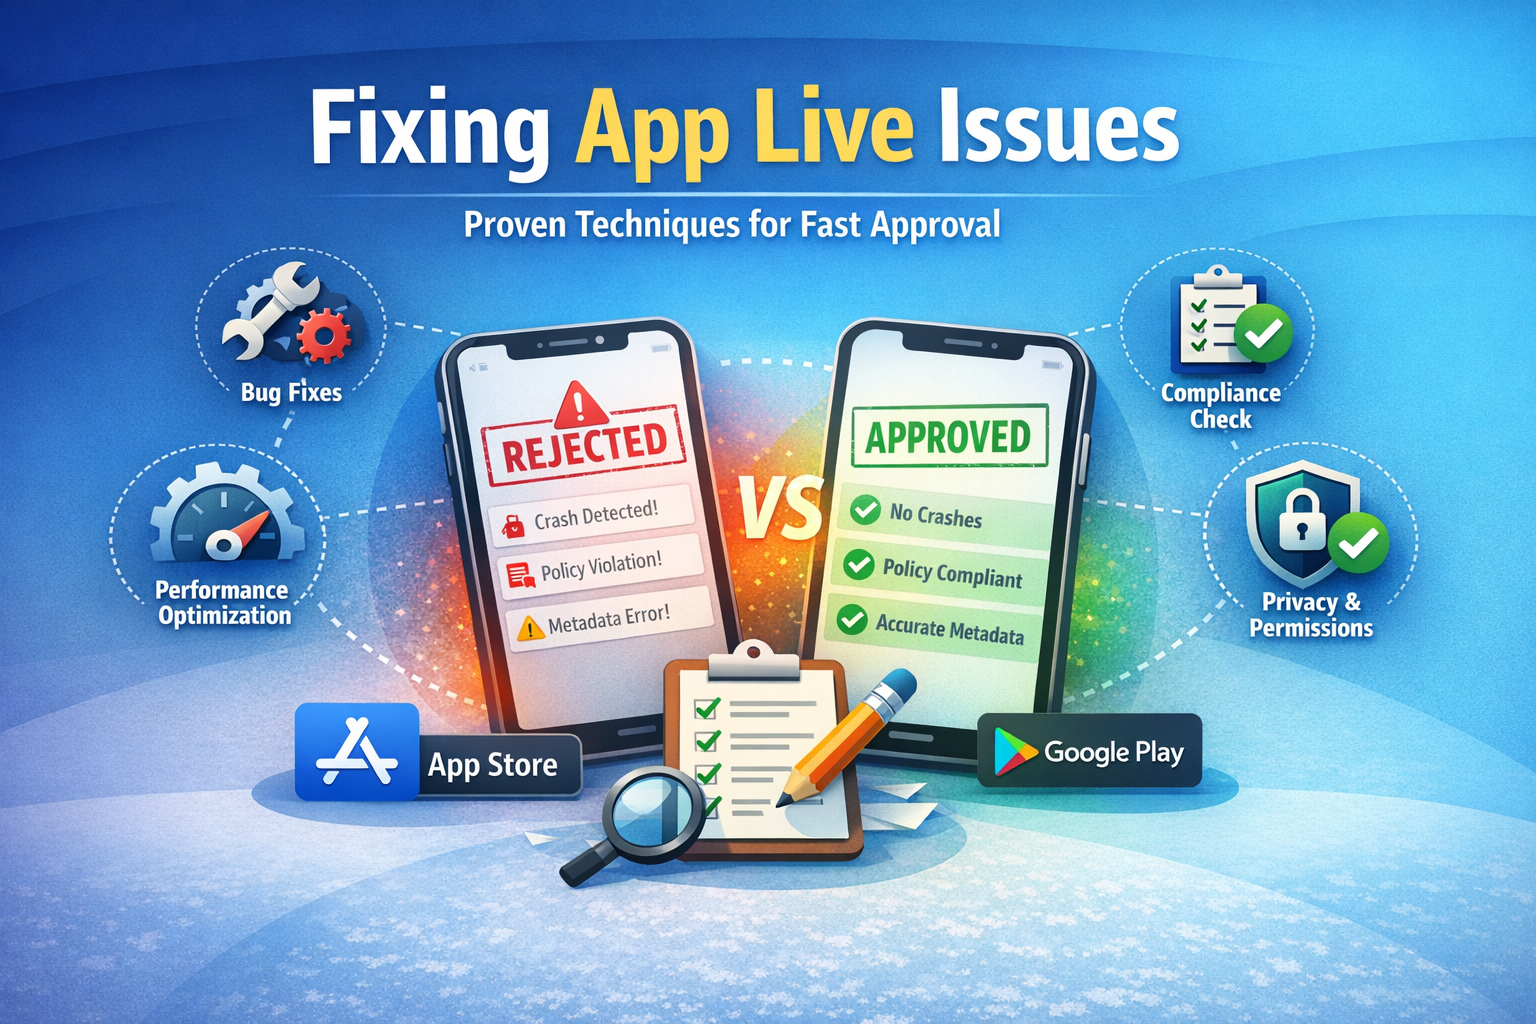
This guide is built specifically to explain techniques to fix the issues of getting app live, using real-world examples, platform-specific insights, and proven best practices. Whether you are launching your first mobile app or managing releases at scale, this article will help you avoid common mistakes and get your app approved faster.
We will break down why apps fail to go live, how app store review systems actually work, and which techniques consistently solve approval issues on both the Apple App Store and Google Play Store.
Introduction: Why Getting an App Live Is Harder Than It Seems
Getting an app live is not just about writing clean code and uploading a build.
It is a multi-layered process involving technical stability, policy compliance, user privacy, performance optimization, and accurate app store metadata.
According to Google Play data, over 30% of first-time app submissions are rejected or delayed due to preventable issues such as missing disclosures, broken functionality, or policy violations. Apple’s App Store shows similar patterns, especially for new developers unfamiliar with its strict review guidelines.
Common reasons developers struggle to get apps live
- Misunderstanding app store review guidelines
- Submitting unstable or partially tested builds
- Incorrect permission and privacy implementations
- Poorly written app descriptions or misleading screenshots
- Missing reviewer access or demo credentials
What makes the process more difficult is that app store feedback is often brief and highly technical. Developers may fix the wrong issue, resubmit, and get rejected again for the same underlying problem.
This is why applying the right techniques to fix the issues of getting app live is essential. When done correctly, these techniques help you:
- Reduce app store rejections
- Speed up approval timelines
- Prevent repeated review failures
- Build a reliable and repeatable app release process
This guide is written for:
- Mobile app developers working on iOS or Android
- Startup founders preparing for product launches
- Product managers responsible for release cycles
- Agencies and SaaS teams managing multiple apps
Key takeaway:
Getting an app live is not about luck or trial and error. It is about understanding how app review systems work and applying proven techniques that prevent common approval issues before submission.
What Does “Getting an App Live” Mean?
Before applying techniques to fix the issues of getting app live, it’s important to clearly understand what “getting an app live” actually means. Many developers assume it simply means uploading an app build, but the reality is more complex.
Understanding the App Launch Process
Getting an app live refers to the entire process of moving an app from development to public availability on an app marketplace such as the Apple App Store or Google Play Store.
This process typically includes the following stages:
- App build creation
The compiled version of your app (APK, AAB, or IPA) is generated and prepared for submission. - App store listing setup
This includes:- App name
- Description and keywords
- Screenshots and preview videos
- Category selection
- Privacy policy and legal disclosures
- Submission for review
The app is submitted to the app store for manual or automated review. - App review and compliance checks
Reviewers check:- Functionality and stability
- Policy and guideline compliance
- Security and data handling
- Accuracy of metadata
- Approval and publishing
Once approved, the app becomes searchable and downloadable by users.
Only after completing all five steps successfully can an app be considered truly “live.”
Important:
An app uploaded to the console but still under review is not live.
Getting an App Live on Apple App Store vs Google Play
Although the goal is the same, Apple and Google approach app reviews very differently. Understanding these differences helps fix app live issues faster.
| Feature | Apple App Store | Google Play Store |
|---|---|---|
| Review type | Manual human review | Automated + human |
| Review time | 24–72 hours (average) | Few hours to several days |
| Policy strictness | Very strict | Moderately strict |
| Rejection feedback | Detailed but rigid | Short and automated |
| Resubmission tolerance | Low | Moderate |
Apple focuses heavily on user experience, privacy, and polish.
Google prioritizes policy compliance, security, and permissions.
Many issues of getting app live happen because developers treat both platforms the same, which leads to avoidable rejections.
Why Apps Fail to Go Live (High-Level Overview)
Most app launch problems fall into four main categories:
1. Technical Failures
- App crashes during review
- Login does not work
- Features are broken or incomplete
- App freezes on launch
2. Policy Violations
- Missing privacy disclosures
- Restricted content without justification
- Undocumented data collection
- Misleading functionality
3. Metadata and Listing Issues
- App description does not match actual functionality
- Screenshots show features not available
- Incorrect app category
- Keyword stuffing or promotional language
4. Reviewer Access Problems
- No demo account provided
- Login-required apps without credentials
- Region-restricted features not explained
According to Apple’s App Review statistics, nearly 40% of rejected apps are rejected for reasons unrelated to code quality. This highlights why technical skill alone is not enough to get an app live.
Why Understanding This Matters Before Fixing App Live Issues
Many developers jump straight into debugging code when an app is rejected.
In reality, the issue might be:
- A missing privacy policy link
- An unclear explanation of app functionality
- A reviewer unable to access a feature
- A misleading screenshot
Understanding what getting an app live truly involves allows you to apply the right techniques at the right stage.
Expert insight:
“Most app rejections happen because developers focus on building features, not on explaining them to reviewers.”
By mastering the fundamentals of the app launch process, you reduce rejections and improve approval speed dramatically.
Most Common Issues That Prevent an App From Going Live
Even well-built apps can fail to reach the app store if critical issues are overlooked. Understanding these problems is the foundation for applying effective techniques to fix the issues of getting app live.
Based on app store data, developer reports, and review guidelines, the majority of app launch failures fall into three major categories: technical issues, policy violations, and metadata errors.
Technical Issues That Block App Approval
Technical instability is one of the fastest ways to get an app rejected. App reviewers test apps on real devices, not ideal development environments.
Most frequent technical problems
- App crashes during launch or navigation
- Features that do not work as described
- Infinite loading screens or frozen UI
- API failures when network conditions change
- Incomplete onboarding or broken login flows
A study by Firebase Crashlytics found that apps with a crash rate above 1% are significantly more likely to be rejected or delayed during review.
Why reviewers reject unstable apps
App stores prioritize user trust and experience. If an app crashes once during review, it signals risk to end users.
Reviewer expectation:
“Every advertised feature must work consistently under normal usage conditions.”
Real-world example
A fintech startup submitted a budgeting app that worked perfectly in staging.
However, during review, the app crashed when the reviewer denied location access.
Result: Rejection due to unhandled permission errors.
Fix: Implemented fallback logic and error messaging.
App Store Policy and Guideline Violations
Policy violations are one of the most common non-technical reasons apps fail to go live.
Each app store has strict guidelines that govern:
- Data collection and usage
- Advertising practices
- Content restrictions
- Subscription and payment models
Common policy-related issues
- Collecting data without disclosure
- Missing or incorrect privacy policy links
- In-app purchases not using official billing systems
- Misleading claims (health, finance, or performance)
- Hidden features not explained in metadata
Apple reports that privacy-related violations account for over 20% of app rejections globally.
Example: Privacy disclosure failure
An app tracks user location for analytics but does not explain this clearly in the privacy section.
Outcome: Rejected for insufficient disclosure.
Solution: Update privacy policy and explain data usage in App Store Connect.
Metadata and Listing Errors
Metadata issues are underestimated, yet they cause a large percentage of app live delays.
Your app listing must accurately represent what the app does.
Common metadata mistakes
- Description mentions features not present in the app
- Screenshots show outdated UI
- Keywords stuffed unnaturally
- Wrong category selection
- Missing legal or compliance text
Key insight:
App reviewers treat your metadata as a contract. If the app breaks that contract, it gets rejected.
Example of misleading metadata
A productivity app claimed “AI-powered automation” in its description, but no AI features were accessible during review.
Result: Rejection for misleading claims.
Fix: Updated description to reflect actual functionality.
Reviewer Access and Account Issues
Apps that require authentication are often rejected due to lack of reviewer access.
Common access-related problems
- No demo credentials provided
- Reviewer account expires
- Region-locked features without explanation
- App requires SMS or email verification
Best practice
Always provide:
- A working test account
- Clear instructions in the review notes
- Access to all core features
Fact:
Apple explicitly states that missing demo access is one of the fastest ways to trigger rejection.
Summary: Why These Issues Keep Apps From Going Live
Most issues of getting app live are preventable.
They occur because developers focus on building instead of validating and explaining their app to reviewers.
| Issue Type | Impact on Approval |
|---|---|
| Technical crashes | Immediate rejection |
| Policy violations | Mandatory resubmission |
| Metadata errors | Delays or rejection |
| Access issues | Automatic rejection |
Understanding these problem areas makes it easier to apply targeted techniques to fix the issues of getting app live.
Techniques to Fix the Issues of Getting App Live (Step-by-Step)
Once you understand the root causes, the next step is applying proven techniques to fix the issues of getting app live. These techniques are practical, repeatable, and aligned with how app store reviewers actually evaluate submissions.
This section breaks down the most effective fixes, starting with technical stability and ending with compliance and optimization.
1. Fix App Crashes and Stability Issues Before Submission
App stability is the first thing reviewers evaluate. Even a single crash can result in immediate rejection.
Techniques to improve app stability
- Use crash reporting tools such as Firebase Crashlytics or Sentry
- Test on multiple devices and OS versions
- Simulate poor network conditions (slow, offline, unstable)
- Handle edge cases like denied permissions or empty data states
- Remove unused libraries and deprecated APIs
Pre-submission stability checklist
- App launches without crashing
- Navigation flows work end-to-end
- Error messages display clearly
- No placeholder content remains
Data point:
Google Play reports that apps with frequent crashes see up to 50% lower approval success on first submission.
2. Ensure Full Compliance With App Store Guidelines
Policy compliance is non-negotiable. One overlooked rule can block your app from going live.
Techniques to ensure guideline compliance
- Read the latest Apple App Store and Google Play policies
- Map each app feature to a relevant policy section
- Remove hidden or undocumented features
- Avoid restricted content without justification
- Clearly disclose monetization and subscriptions
Compliance best practice table
| Area | Required Action |
|---|---|
| Data collection | Disclose clearly |
| Permissions | Request only what’s needed |
| Ads | Follow ad content rules |
| Payments | Use official billing systems |
Expert insight:
“Most policy violations happen because developers rely on outdated guidelines.”
3. Optimize App Performance and Load Speed
Performance issues rarely cause direct rejection, but they increase the likelihood of failure during review.
Performance optimization techniques
- Reduce app bundle size
- Optimize images and assets
- Cache API responses responsibly
- Minimize background processes
- Improve cold start time
A Google study found that apps that take longer than 5 seconds to load lose reviewer confidence quickly, especially for first impressions.
4. Resolve Permission and Privacy Issues
Privacy compliance is one of the most critical app live approval factors.
Techniques to fix privacy-related issues
- Request permissions only when needed
- Explain why permissions are required
- Add a valid, accessible privacy policy
- Match privacy disclosures with actual behavior
- Avoid collecting unnecessary user data
Example of good permission handling
Instead of requesting location access on launch, ask for it only when a location-based feature is used, with a clear explanation.
5. Validate App Functionality Against Metadata
Your app must do exactly what your listing claims.
Techniques to align app and metadata
- Review descriptions line by line
- Remove exaggerated marketing language
- Ensure screenshots reflect current UI
- Match features mentioned with actual access
- Avoid future feature promises
Reviewer mindset:
“If the feature is mentioned, it must be visible and usable.”
6. Use a Pre-Submission Review Checklist
One of the most effective techniques to fix app live issues is using a final checklist.
App live readiness checklist
- No crashes detected
- Policies reviewed and complied with
- Permissions documented
- Demo access provided
- Metadata accurate and updated
Companies that use structured pre-launch checklists report 30–40% fewer rejections on first submission.
Case Study: Fixing App Live Issues in One Submission
A SaaS productivity app was rejected twice due to:
- Missing privacy disclosures
- Broken onboarding flow
After applying the techniques above:
- Crashes were eliminated
- Metadata was rewritten
- Reviewer access was clarified
Result: App approved in 24 hours on the third submission.
Why These Techniques Work
These techniques work because they align with how reviewers think, not just how developers build.
They focus on:
- Predictability
- Transparency
- User safety
- Consistent functionality
When applied systematically, they dramatically reduce issues of getting app live.
How to Fix App Store Rejections After a Failed Review
Even with preparation, app rejections still happen.
What matters most is how you respond. Applying the right techniques to fix the issues of getting app live after rejection can turn a failed review into a fast approval.
This section explains how to decode rejection messages, fix the real problem, and resubmit confidently.
How to Read and Understand Rejection Messages
App store rejection messages are often short, technical, and vague.
Many developers fix surface-level issues instead of the root cause, leading to repeated rejections.
How to break down a rejection notice
- Identify the policy or guideline referenced
Always look for the exact section number. - Determine whether the issue is technical or policy-based
- Crashes = technical
- Missing disclosure = policy
- Misleading content = metadata
- Check if the issue affects core functionality
Reviewers focus on user-impacting problems first.
Tip:
Never resubmit without fully understanding the cited guideline.
Best Techniques to Fix App Store Rejections Quickly
Speed matters when fixing app live issues. The longer an app stays rejected, the more momentum you lose.
Proven techniques for fast fixes
- Address all related issues, not just the one mentioned
- Test fixes on real devices
- Update metadata if functionality changed
- Add clear explanations in review notes
- Avoid partial or temporary solutions
Resubmission best practices
| Action | Impact |
|---|---|
| Clear explanation | Builds reviewer trust |
| Complete fix | Prevents repeat rejection |
| Professional tone | Improves communication |
| Fast response | Reduces review delays |
How to Respond to Reviewers Professionally
Communication quality affects approval speed more than most developers realize.
What to include in your response
- Acknowledge the issue clearly
- Explain what was fixed
- Reference the policy section
- Provide steps to verify the fix
Example response format
“We identified the issue related to Guideline 5.1.1.
The app now requests location access only when required, and the privacy policy has been updated accordingly.”
Avoid emotional language or defensive explanations.
When and How to Appeal an App Store Rejection
Appeals should be used strategically, not emotionally.
Valid reasons to appeal
- Reviewer misunderstood app functionality
- App complies with guidelines as written
- Rejection contradicts previous approvals
Appeal best practices
- Provide screenshots or screen recordings
- Reference exact policy language
- Keep explanations factual and concise
Fact:
Apple approves a significant number of appeals when developers provide clear evidence.
Avoiding Repeat Rejections
Repeat rejections damage credibility and slow approvals.
Techniques to prevent multiple rejections
- Fix related issues proactively
- Re-review entire app, not just rejected area
- Double-check metadata and permissions
- Test reviewer-specific flows
Apps rejected three or more times often face longer review cycles in the future.
Summary: Turning Rejection Into Approval
Rejection is not failure. It is feedback.
When handled correctly, it helps you:
- Improve app quality
- Strengthen compliance
- Build better release processes
Applying these techniques to fix the issues of getting app live after rejection can reduce approval time by days or even weeks.
App Listing Optimization Techniques That Improve Approval Rates
Many developers think app listings only affect downloads.
In reality, app listings play a critical role in app approval. Poorly optimized listings are a common but overlooked issue of getting app live.
This section covers listing optimization techniques that not only improve discoverability but also reduce rejection risk.
Writing Clear and Compliant App Descriptions
Your app description is a legal and functional declaration, not just marketing copy.
Techniques to fix description-related app live issues
- Describe only features that exist
- Avoid exaggerated or unverifiable claims
- Explain how core features work
- Mention limitations clearly
- Use plain, factual language
Examples of risky vs compliant language
| Risky Description | Compliant Alternative |
|---|---|
| “Guaranteed results” | “Designed to help improve” |
| “AI-powered” (no AI) | “Automated workflows” |
| “Secure by default” | “Uses industry-standard encryption” |
Reviewer mindset:
If a claim cannot be tested during review, it increases rejection risk.
Improving Screenshots and App Preview Videos
Visual assets must accurately reflect real app behavior.
Common visual mistakes
- Showing unreleased features
- Using outdated UI screenshots
- Adding promotional text overlays
- Including third-party logos without permission
Best practices for approval-friendly visuals
- Use real in-app screens
- Keep text minimal and descriptive
- Match UI across all screenshots
- Show core functionality clearly
Apple reports that misleading screenshots are among the top 10 rejection reasons for new apps.
Using Keywords Without Violating Store Policies
Keyword usage is important, but over-optimization triggers rejection.
Safe keyword techniques
- Use keywords naturally in descriptions
- Avoid repeating keywords excessively
- Do not add competitor names
- Do not use unrelated trending terms
SEO vs ASO difference:
App store algorithms penalize spam faster than search engines.
Category and Tag Selection Matters
Choosing the wrong category confuses reviewers and users.
Techniques to select the right category
- Choose the primary function of your app
- Avoid categories for visibility alone
- Align tags with real functionality
Incorrect categorization often leads to manual re-review and delays.
Localization and Regional Compliance
Apps available in multiple regions must comply with local regulations.
Common localization issues
- Missing translated descriptions
- Region-specific features not explained
- Legal text not localized
Fact:
Apps with incomplete localization are more likely to be delayed during review.
Checklist: App Listing Optimization for Approval
- Descriptions match functionality
- Screenshots reflect current UI
- Keywords used naturally
- Category selected correctly
- Legal disclosures present
Applying these listing optimization techniques reduces the issues of getting app live and improves approval speed.
Testing Techniques to Prevent App Live Issues Before Submission
Testing is one of the most effective preventive techniques to fix the issues of getting app live.
Many app rejections happen because problems that could have been caught early are discovered during review instead.
This section explains what to test, how to test, and why it matters before submitting your app.
Pre-Launch Testing Checklist
A structured testing process ensures your app behaves consistently across environments.
Core areas to test before submission
- App launch and onboarding
- Navigation between screens
- Login and logout flows
- Offline and slow network behavior
- Error handling and edge cases
Example testing table
| Test Area | What to Check |
|---|---|
| UI/UX | Layout breaks, responsiveness |
| Functional | Feature availability |
| Performance | Load time, memory usage |
| Stability | Crashes and freezes |
Apps that undergo full pre-launch testing are up to 60% less likely to be rejected on first review.
Beta Testing Techniques
Beta testing allows real users to find issues that internal teams often miss.
Tools for beta testing
- TestFlight (iOS)
- Google Play Internal Testing
- Closed testing groups
What to test during beta
- First-time user experience
- Feature discoverability
- Permission prompts
- App behavior under real usage
Expert insight:
“If users struggle during beta, reviewers will too.”
Security and Compliance Testing
Security issues are taken seriously by app stores.
Security testing techniques
- Test authentication flows
- Validate encryption usage
- Ensure APIs are protected
- Prevent data leaks
Google Play requires apps to meet minimum security standards, especially for apps handling sensitive data.
Accessibility and Usability Testing
Accessibility issues may not always cause rejection, but they affect user experience.
Areas to check
- Text readability
- Touch target sizes
- Screen reader compatibility
- Color contrast
Apple encourages accessibility compliance and often flags major usability problems during review.
Testing Reviewer-Specific Scenarios
Reviewers often test apps differently than normal users.
Reviewer-focused testing techniques
- Test with fresh accounts
- Test without permissions granted
- Test without onboarding guidance
- Test region-based restrictions
Providing clear instructions in review notes helps prevent confusion.
Case Study: How Testing Prevented App Rejection
A health app failed review due to broken onboarding.
After adding:
- Automated testing
- Beta user feedback
- Edge case handling
Result: Approved on next submission with no additional comments.
Summary: Why Testing Matters
Testing shifts discovery of issues from reviewers to developers.
It saves:
- Time
- Reputation
- Review cycles
Strong testing practices reduce the issues of getting app live and increase approval confidence
How to Fix App Live Issues for iOS Apps
Getting an iOS app live comes with unique challenges due to Apple’s strict App Store guidelines. Even minor oversights can lead to rejection, making platform-specific techniques essential for fixing app live issues.
This section covers common iOS app problems and practical techniques to ensure smooth approval.
Common iOS App Store Rejection Reasons
Apple’s App Store focuses heavily on user experience, privacy, and security. Some of the most frequent reasons for rejection include:
- Incomplete sign-in or onboarding requirements
Apps that require login but don’t provide credentials for review often fail. - Missing demo accounts
Apps with restricted access need a functioning demo account for the reviewer. - In-app purchase issues
Not using Apple’s official payment system triggers immediate rejection. - Crashes and bugs
Even minor crashes or unstable navigation can block approval. - Non-compliance with UI standards
Inconsistent layouts or poor accessibility often cause delays.
Techniques to Fix iOS App Approval Issues
1. Provide Reviewer Access
- Create demo accounts with full functionality
- Include login credentials in App Store Connect notes
- Ensure test accounts don’t expire before review
2. Handle In-App Purchases Correctly
- Use Apple’s in-app purchase API
- Clearly display pricing and subscription details
- Avoid misleading upgrade claims
3. Ensure Privacy and Permissions Compliance
- Explain all permission requests (location, camera, microphone)
- Include a valid privacy policy link in the app and metadata
- Avoid collecting data not disclosed in the policy
4. Fix Technical Bugs and Crashes
- Test on multiple iOS devices and versions
- Implement proper error handling
- Ensure smooth navigation and onboarding
5. Optimize Metadata and Visuals
- Screenshots should reflect the actual UI and app flow
- Descriptions should be accurate, simple, and compliant
- Avoid marketing exaggeration or unimplemented features
Case Study: iOS App Fix
A productivity app targeting iOS was rejected because:
- The reviewer could not access premium features
- Screenshots showed features not yet implemented
- Location permission explanation was missing
Techniques applied:
- Provided demo login credentials
- Updated screenshots to match current UI
- Added clear permission explanations
Result: Approved in 48 hours on resubmission.
iOS-Specific Best Practices
- Test on latest iOS and older versions for compatibility
- Ensure compliance with Apple Human Interface Guidelines
- Keep app size optimized; Apple flags apps that are too large
- Review App Store metadata carefully before submission
Expert tip:
Apple reviewers evaluate apps as a user would. If it’s confusing, incomplete, or unstable, the app will be rejected regardless of technical quality.
Summary: Fixing iOS App Live Issues
Applying these techniques ensures:
- Stable, functional app builds
- Full compliance with App Store guidelines
- Clear communication with reviewers
- Faster approval and fewer rejections
By focusing on platform-specific compliance and user experience, developers significantly reduce issues of getting app live on iOS.
How to Fix App Live Issues for Android Apps
Getting an Android app live on Google Play Store has its own challenges. While Google’s review process is generally faster than Apple’s, it emphasizes policy compliance, permissions, and security. Ignoring these areas can prevent your app from going live.
This section covers common Android app issues and practical techniques to fix them effectively.
Common Google Play Store Issues
The most frequent reasons Android apps fail to get approved include:
- Policy declaration errors
- Missing or incorrect declarations for sensitive permissions (e.g., location, camera, contacts)
- Incomplete data privacy statements
- Target API level issues
- Apps must target current Android SDK versions
- Outdated API levels trigger automatic rejection
- Ads policy violations
- Misleading ads
- Ads that interrupt or degrade core app functionality
- App crashes or technical instability
- Crashes during review, especially on older devices
- Unsupported device resolutions
- Restricted content violations
- Apps promoting gambling, health claims, or restricted content without approval
Fact:
Over 25% of new apps are delayed or rejected due to improper permission declarations.
Techniques to Fix Google Play App Rejections
1. Update Target SDK and Dependencies
- Always target the latest Android API level
- Keep third-party libraries updated
- Test on multiple devices and Android versions
2. Correct Permission Declarations
- Request only necessary permissions
- Provide clear justifications for sensitive permissions in the app and Play Console
- Avoid requesting all permissions upfront
3. Fix Technical Bugs and Crashes
- Test app extensively on both emulators and real devices
- Use Crashlytics or Firebase Performance Monitoring to catch bugs
- Handle edge cases gracefully
4. Optimize App Store Listing
- Ensure description accurately reflects features
- Screenshots show real app functionality
- Category selection matches core app purpose
5. Comply With Ads and Monetization Policies
- Use Google’s approved ad formats
- Avoid intrusive ads that block navigation or degrade UX
- Clearly display subscription terms or in-app purchase details
Case Study: Android App Fix
A health tracking app failed review due to:
- Missing sensitive permission explanation
- Outdated SDK target
- Screenshots showing unreleased features
Applied techniques:
- Updated target SDK and libraries
- Added permission justifications in-app and in Play Console
- Updated metadata and screenshots
Result: App approved within 24 hours after resubmission.
Android-Specific Best Practices
- Keep metadata and visuals aligned with functionality
- Provide demo or test accounts if login is required
- Test app on a range of devices and screen sizes
- Maintain clear, transparent privacy and permission notices
Expert tip:
Google reviewers focus on security, privacy, and functionality, but unlike Apple, technical crashes are more forgiving if they are rare and non-critical.
Summary: Fixing Android App Live Issues
Applying platform-specific techniques ensures:
- Correct SDK and API usage
- Accurate permissions and privacy compliance
- Stable and fully tested app builds
- Clear communication with reviewers
By addressing these areas systematically, developers can significantly reduce issues of getting app live on Google Play.
Advanced Techniques to Avoid App Live Issues in the Future
Once your app is live, the goal is to prevent future delays and rejections. Many developers repeatedly face app store issues because they treat launches as one-off events rather than a repeatable, well-documented process.
Applying advanced techniques ensures smoother submissions, faster approvals, and fewer technical or policy surprises.
1. Create a Comprehensive App Launch Checklist
A structured checklist saves time and prevents missed steps.
What to include:
- Technical checklist
- Crash-free builds
- Functional UI flows
- API and network stability
- Policy checklist
- Permissions explained
- Privacy disclosures included
- Monetization compliance
- Marketing checklist
- Accurate metadata
- Screenshots and preview videos up to date
- App description reviewed and compliant
Tip:
Maintain separate checklists for iOS and Android due to platform-specific requirements.
2. Automate App Testing and Compliance Checks
Automation reduces human error and speeds up the release process.
Techniques:
- Continuous Integration / Continuous Deployment (CI/CD) pipelines
Automatically run builds and tests before submission. - Automated testing tools
- Unit tests for functionality
- UI tests to catch broken flows
- Performance tests for load time and responsiveness
- Static code analysis and linting
Catch deprecated API usage or security risks early.
Case study:
A SaaS company reduced app rejections by 40% after integrating automated testing into its CI/CD pipeline.
3. Work With App Review Consultants or Experts
Hiring experts can help anticipate issues before submission, especially for first-time launches.
When expert help is valuable:
- Complex apps with multiple integrations
- Apps handling sensitive data (finance, health, location)
- Teams managing multiple apps with tight deadlines
Common services offered by experts:
- Pre-submission compliance audits
- App store listing optimization
- Test account setup for reviewers
- Guidance on policy adherence
Cost vs benefit:
Paying for expertise upfront often saves weeks of resubmission delays and reduces frustration.
4. Monitor Post-Launch Metrics and Feedback
Even after approval, apps can face issues with updates.
Monitoring techniques:
- Crash reporting and analytics
Detect and fix issues proactively before users complain. - User feedback and reviews
Identify functional or usability problems early. - Update compliance checks
Ensure that new features or versions comply with policies before release.
5. Build a Repeatable Launch Process
Make launching apps predictable, documented, and repeatable:
- Maintain a version control log with release notes
- Keep updated guidelines for reviewers for each platform
- Implement pre-submission testing routines
- Document lessons learned from past rejections
Expert insight:
Companies with documented app release processes spend 50% less time fixing app live issues.
Summary: Future-Proof Your App Launch Process
By applying these advanced techniques, you:
- Reduce risk of repeated rejections
- Ensure faster, smoother app updates
- Improve communication with reviewers
- Maintain higher quality and compliance standards
Key takeaway: Treat app launches as a structured, repeatable workflow rather than a one-off task. This mindset prevents most common issues of getting app live and speeds up your release timeline.
Frequently Asked Questions About Fixing App Live Issues
Even with careful preparation, developers often have recurrent questions about getting apps live. Addressing these FAQs helps clarify common confusion and provides actionable insights for fixing app live issues.
How long does it take to get an app live?
- Apple App Store: Typically 24–72 hours for a first submission, but complex apps or those requiring manual review can take up to a week.
- Google Play Store: Automated reviews can be completed in a few hours, but new apps or apps with sensitive permissions may take 1–3 days.
Tip: Always plan for extra buffer time in your release schedule.
Can an app be permanently rejected?
Yes, but permanent rejections are rare. Most apps are rejected temporarily due to fixable issues such as:
- Policy non-compliance
- Technical crashes
- Missing reviewer access
Permanent rejection usually occurs if an app violates serious policies repeatedly, such as:
- Malware or harmful content
- Copyright infringement
- Dangerous behavior
What happens if my app keeps getting rejected?
Repeated rejections can:
- Delay your launch timeline
- Increase scrutiny on future submissions
- Lower reviewer confidence in your app
Techniques to fix repeated rejection issues:
- Conduct a full technical and policy audit
- Fix underlying root causes, not just symptoms
- Improve documentation and reviewer notes
- Consider expert consultation for complex apps
Do app updates go through the same review process?
Yes. Both iOS and Android review app updates, though:
- Minor bug fixes may be fast-tracked
- Major updates, especially those adding features or permissions, require full review
- Metadata changes can trigger additional scrutiny
Tip: Always apply the same pre-submission checklist for updates to avoid new rejections.
Can I submit the same app multiple times?
Yes, but blind resubmissions without fixing issues are counterproductive.
- Each resubmission should address all feedback
- Repeated submissions with unresolved issues increase review delays
- Ensure builds, metadata, and reviewer access are fully updated
Summary of Key FAQ Takeaways
- App live timing varies by platform and complexity
- Permanent rejections are rare but serious
- Repeated rejections usually signal unfixed root issues
- Updates and resubmissions require the same level of preparation
Key insight:
Understanding the review process and anticipating common issues dramatically improves the chances of successful app live approval.
Final Checklist: Techniques to Fix the Issues of Getting App Live
To make sure your app gets approved smoothly and efficiently, it’s essential to follow a structured checklist. This final checklist consolidates all the techniques discussed throughout this guide and ensures nothing is overlooked.
1. Fix Crashes and Stability Issues
- Test app on multiple devices and OS versions
- Use crash reporting tools (Firebase Crashlytics, Sentry)
- Handle edge cases and error states properly
2. Ensure Policy and Compliance
- Review Apple and Google Play guidelines thoroughly
- Remove hidden or undocumented features
- Include accurate privacy policy and permission explanations
- Ensure monetization and ads comply with platform rules
3. Optimize App Performance
- Reduce app size and optimize assets
- Improve load time and responsiveness
- Cache data efficiently and handle slow network conditions
4. Align App Functionality with Metadata
- Ensure screenshots reflect current UI
- Keep description accurate and compliant
- Avoid exaggerated claims or promises of future features
5. Provide Reviewer Access
- Create demo/test accounts for login-required apps
- Include instructions for accessing all features
- Ensure regional or account-specific features are accessible
6. Test Thoroughly Before Submission
- Functional testing of all features
- Regression testing after updates
- Security testing for sensitive data
- Accessibility and usability testing
7. Optimize App Store Listing
- Accurate descriptions, keywords, and categories
- Screenshots and preview videos match actual UI
- Clear, concise, and compliant metadata
- Localization for regions where the app is available
8. Respond to Rejections Professionally
- Understand the rejection reason fully
- Fix root issues, not just surface symptoms
- Provide clear, factual explanations in review notes
- Avoid emotional or defensive responses
9. Plan for Updates and Future Releases
- Apply the same checklist for updates
- Document lessons learned from previous submissions
- Automate testing and compliance checks where possible
- Keep metadata and app functionality aligned
10. Use Advanced Launch Techniques
- Maintain structured launch workflows for each platform
- Integrate CI/CD pipelines and automated testing
- Consider expert consultation for complex apps
- Monitor post-launch metrics and user feedback
Quick Reference Table: Common Fixes vs Issues
| Issue | Technique to Fix |
|---|---|
| Crashes / Bugs | Pre-launch testing, crash reporting |
| Metadata mismatch | Update screenshots and descriptions |
| Policy violations | Review guidelines, correct permissions, privacy |
| Reviewer access | Provide demo/test accounts and instructions |
| Slow performance | Optimize assets, caching, load times |
| Repeated rejections | Root cause analysis, full audit |
Key takeaway:
Following this final checklist ensures your app is fully prepared for review, significantly reduces rejection risk, and speeds up the approval process.